It's been more than a year since I combined this blog with my personal blog, Sophie Junction. All the posts, free patterns and tutorials have been imported there ... and lots of new ones have been added.
Check out my Freebies page for the list of tutorials, projects and quilt block patterns.
Thursday, February 28, 2013
Friday, July 01, 2011
Liberated Checkerboard Block
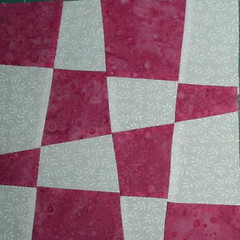 This liberated variation of the classic 16-patch block is easy to cut and sew . . . as long as you take care to keep things organized.
 The blocks are made two-at-a time, beginning with 2 large squares. The finished size of your liberated checkerboard block will be 2-to-2 1/2 inches smaller than the these squares.
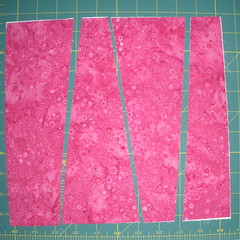
For the Block Lotto in July 2011 (and these examples), we used 10 inch squares to start: one white and one solid or tone-on-tone (TOT) print in a medium to dark value with high contrast.
CUT FABRICS
For the Block Lotto in July 2011 (and these examples), we used 10 inch squares to start: one white and one solid or tone-on-tone (TOT) print in a medium to dark value with high contrast.
CUT FABRICS
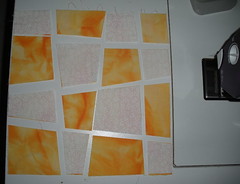
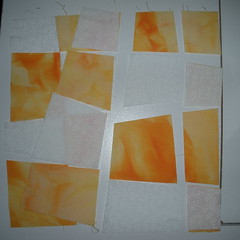
- Place fabrics on the cutting mat, one on top of the other with edges aligned. Both fabrics must be right sides up.
- Vertical cuts: make 3 straight cuts from the top edge to the bottom edge. The sections do not have to be even and the cut lines may be as slanty as you decide to make them. There should be at least one inch between the cuts and at the outside edges. I pulled the sections apart so that you could see them--you don't need to do that and can leave them just as they are on your cutting mat.
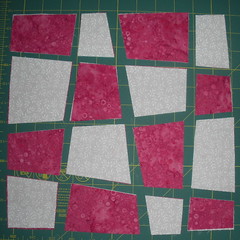
- Horizontal Cuts: Make three straight cuts from left edge to right edge. If it makes it easier for you, you can rotate the mat (or walk around the table), but avoid moving the cut fabric pieces. The same 1-inch rule of thumb applies.

PREPARE TO SEW
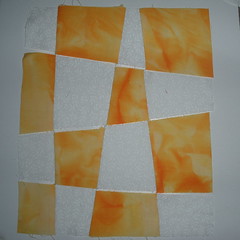
- Create the checkboard by swaping top and bottom fabrics of every other piece.
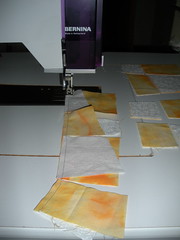
- Carefully move to your sewing area–because these irregular shaped pieces will only go together ONE WAY, carefully move them close to your machine. I used a 12-inch square ruler as a platter to carefully transfer my pieces from cutting table to sewing table.
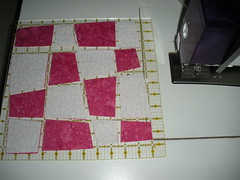
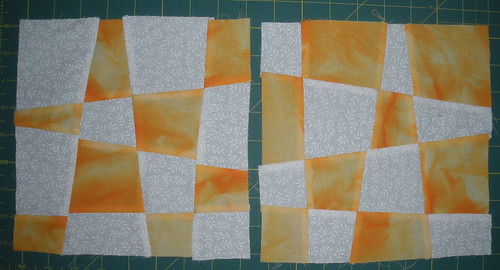
You now have the pieces for two Liberated Checkerboard blocks. Sew them together as a 16-patch. Here’s the approach I used to keep everything organized and correctly oriented–I’m a little dyslexic and so I need to be VERY careful or something will get turned around.
 | 1. Get Organized Carefully lay out the stacked pieces (for two blocks) next to your sewing machine to prepare for assembly. |
 | 2. Begin Working Top-to-Bottom, Left-to-Right Flip each of the top fabrics in the second column, onto the first column, like turning a page in a book. |
 | 3. Chain Sew the Pairs Sew the pairs together, from Top-to- Bottom. After you've sewn the pieces from the "top" block, repeat the process for the second block. Leave the four pairs of each block connected (by thread)—only snip the thread between blocks. |
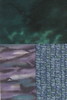
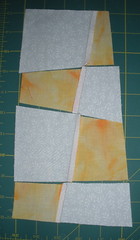 | 4. Press after every set of seams I found it easiest to press after the pieces in each column are sewn. Always press toward the non-white fabric–it will make matching the seams easier later. This photo shows the BACK after the first set of seams have been sewn and pressed. |
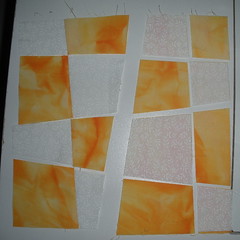 | 5. Layout the Block with Sewn Pieces Put the sewn, and pressed section back in place in your block layout. |
 | 6. Continue to Work Left-to-Right, Top-to-Bottom "Turn the pages" of the pieces in the third column and place them on top of the corresponding piece to the left. Chain sew these four seams as before. Add the third column to the second block of your pair. |
 | 7. Press and Repeat Press the second set of seams and Repeat with the last column of squares. Your block will now consist of 4 sections (rows) that are held together at the intersections by the thread left in place from chain piecing. |
 | 8. Sew the “rows” together Fold the top row down. If the seam intersections are connected by the thread from your chain piecing, you may find, as I did, that you do not need pins to accurately sew the seam, matching the intersections. Stitch and repeat for each row of both blocks until your checkerboard block PAIR is done. |
You may decide to square-up all your blocks and trim to the same size. For the block lotto, we're sending the blocks UNTRIMMED and allowing the winner to decide how he or she will use them.
Here's a look at how 35 liberated checkerboard blocks randomly arranged might look--with block photos from Béa, Cathy, Cheri, Ginny, Jennifer, Julie, Kate, Kathie, Linda, Linnea, Mary Jane, Michelle and Toni.


Thanks to everyone for the great block photos that made this virtual quilt possible. If you make a quilt or other project from this liberated checkerboard block, I'd love to see it.
Tuesday, May 31, 2011
Three-patch Rectangles
 This simple 6 inch by 9 inch (finished size) block was influenced by the proportions of the golden rectangle.
It showcases the fabrics used and/or the quilting design. It's quick and easy construction makes it a good choice for a last minute gift or a quilt-in-a-day project.
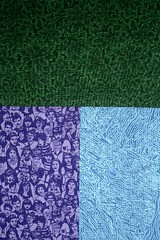
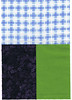
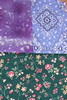
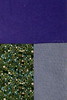
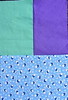
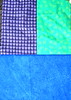
For the June 2011 Block Lotto, we are making blocks in an analogous colorway of green-blue-violet, including one green, one blue and one violet fabric in each block.
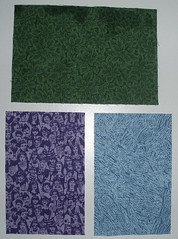
CUTTING
For each block,
Cut 1 rectangle - 4.5 x 6.5 inches
Cut 2 rectangles - 3.5 x 5.5 inches
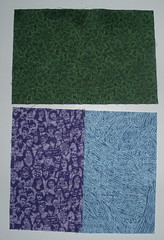
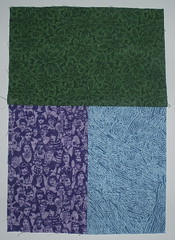
SEWING THE BLOCK
- Sew the two smaller rectangles together, along their long sides, Press toward the darker fabric.
- Add the large rectangle to the top. Press the seam toward the large rectangle. The block should measure 6 1/2 by 9 1/2 inches.
Here is a sampling of blocks made by some quilters in the Block Lotto community.
For a clean, minimalist look, surround each of the blocks with wide borders in a solid neutral–simulated by white space here–and arrange them all with the same orientation:


For more virtual blocks and layout ideas, check out the June Guidlines for the Block Lotto
Subscribe to:
Posts (Atom)