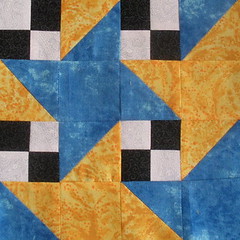
Milky Way is one of those quilt blocks that really seems to be more like a block and a half, whose pattern is only revealed when multiple blocks are put together in a straight set. Then the the beauty of the allover pattern of interlaced friendship stars is revealed.
According to Barbara Brackman in the Encyclopedia of Pieced Blocks, the name for this block is credited to the Ladies Art Company, a publication that was active from 1895 to 1934.
This eight inch block (finished size), in the colors shown, in the October choice for the Block Lotto. More details for joining and playing along with us can be found on our group blog. Everyone is welcome.
Cutting Fabrics for One Block
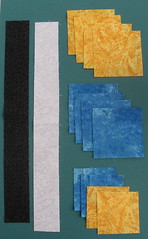
Black & White Fabrics:
1 long rectangle each 1.5 inch x 12 inches–a little longer if you want to give yourself a little wiggle room.
Blue & Yellow Fabrics:
2 squares each 2-1/2 inches
4 squares each 2-7/8 inches–you may round these up to 3 inches and trim after sewing the half square triangle (HST) units.
Assembling the 4-Patch Units
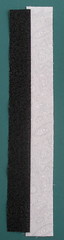
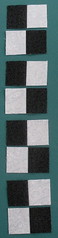
- Sew the black and white strips together along their long edges. Press toward the black fabric.
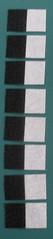
- Cut the strip into eight 1-1/2 inch units
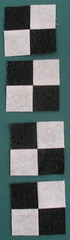
- Take two of the 1-1/2 inch units, flip one around to form a checkboard and sew them together into 4-patches
- You will have four 4-patch units, each measuring 2-1/2 inches square.
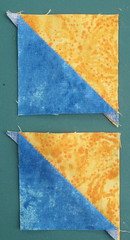
Assembling the Half Square Triangle (HST) Units
The four pairs of large squares are used to create HST units. There are many ways to construct these . . . here is one.
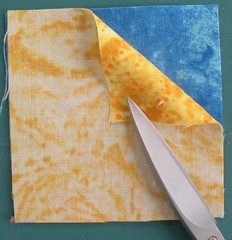
- Place one blue and one yellow square together, right sides together.
- Draw a line diagonally across the top square
- Stitch 1/4 inch away from the line on each side. Cut apart on the line.

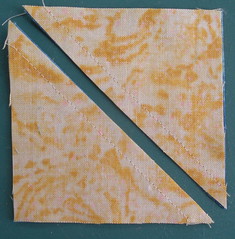
- Press the HST Units open, pressing the seam toward the blue side
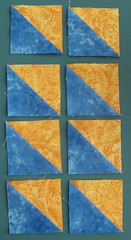
- Square up the HST units to 2-1/2 inches square.
- Repeat with each blue-yellow pair of squares. You will create eight HST units.

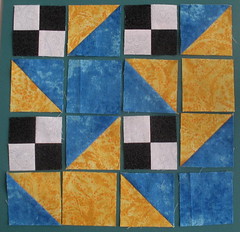
Creating the Milky Way Block
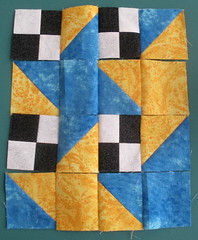
Lay out your 4-path units, HST units and plain squares to form the Milky Way block.
And now the tricky part begins–at least for dyslexic quilters like me–keeping it all straight.
Another approach is to use chain piecing to attach things and keep them attached through the assembly process. Here's how I applied that technique to this block.
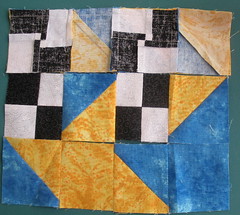
Working from top-to-bottom, I sewed the pairs in the left two columns together and the right two columns together, leaving each set of four pairs chained together. Then I carefully put the sewn pairs together and sewed each row together, leaving all the "chains" between all the pairs intact.
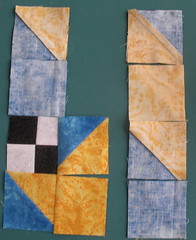
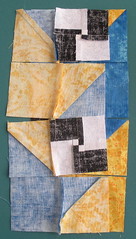
Only at this point, with all the rows sewn together and attached to one another by the chains did I pick up the block and take it over to the ironing board to press seams. At this point, sewing the rows together–with confidence that I hadn't flipped anything around–was pretty easy . . . though I do admit I used pins to make sure my seams matched.
I have seen this technique demonstrated, but have never used it before. I thought because this block had a lot of opportunity to go wrong, it was a good one to try it and I liked the result.
That said, it does make the pressing and sewing a little bit more fiddlely that usual. Still, it's a good one, I think, to add to a quilter's bag of tricks for the next time you run into a block that just keeps coming out wrong . . . we've all had one of those days occasionally, haven't we?
Oh yea, here's the finished Milky Way block.
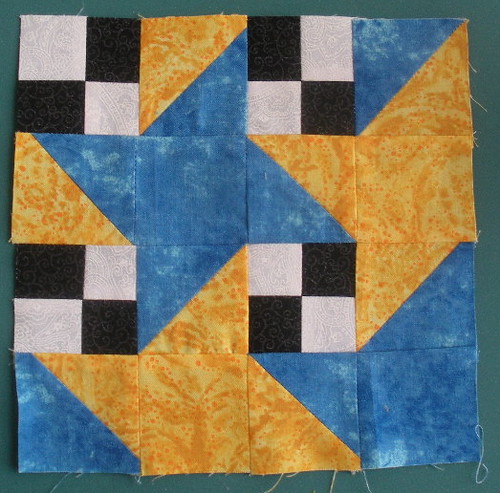
And here's a nice example of how a few of these look when they're laid side by side. Lisa made these 11 blocks for the October Block lotto. I think these blocks will become a quick quilt to be made for the winner this month.

When you look at the field of stars, it's easy to see how this block came by it's name, isn't it?