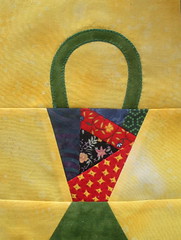
 My approach for making this liberated basket block once again starts with a large rectangle of background fabric into which you "draw" the design of the block with your rotary cutter.
The finished size of my example block is 6 1/2 inch wide by 8 1/2 inches tall (to finish at 6 x 8).
FABRICS
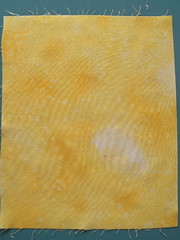
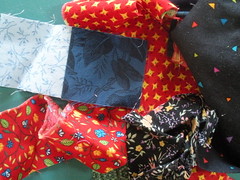
I began with a background rectangle that was 8 inches x 10 inches, some scraps for the basket–try to use at least 5 different fabrics–and a small amount of a coordinating tone-on-tone fabric for the basket base and handle.
For the June 2010 Block Lotto, we'll be using yellow or gold background fabrics; red tone-on-tone prints or solids for the handle and base; and the quilter's choice of scraps for the body of the basket.
Remember, you can click any of the photos for a larger image. All the images (with directions in the descriptions) can be found in my Flickr photoset Liberated-Style Basket Step-by-Step.
MAKING THE BLOCK
- Position the background fabric on your cutting mat so that it's taller than it is wide. (aka "profile" orientation.
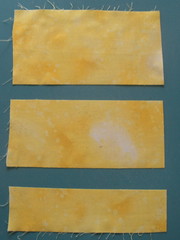
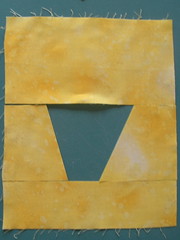
- You'll be drawing your block with your rotary cutter and a straight edge–it might be a ruler, but you don't need to measure anything. Make 2 horizontal cuts. The top one defines the top of your basket and the space you'll have for the handle. The bottom one defines the height of the base of the basket. The scrappy, pieced basket will be as tall as the middle section. Pull apart the sections to make it easy to work on each one separately.
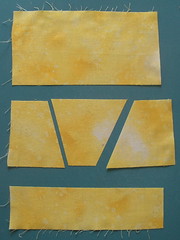
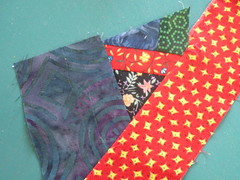
- Draw the basket shape by making two angled cuts in the center section to define the basket shape you'd like. They don't have to be symmetrical (mine aren't).
- Remove the basket shape and reassemble your background pieces, but don't throw it away–we'll come back to that in a bit. Slide the three sections back together–this will give you an idea of how your block looks so far.
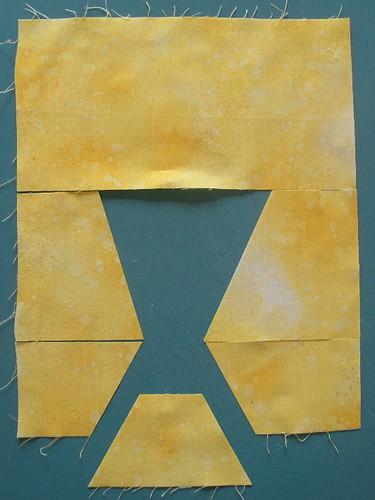
- Make two vertical cuts to draw the basket base shape. The top of the base should align with the bottom of the basket. Remove the basket base you've just cut. It becomes the pattern.
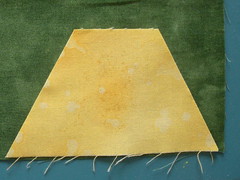
- Using the base you just drew with your rotary cutter and removed, cut a base from your handle/basket fabric. Be sure that both fabrics are right side up so that the new basket base will fit in the space you created in the background.
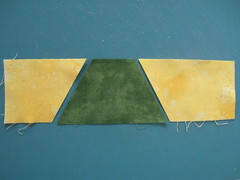
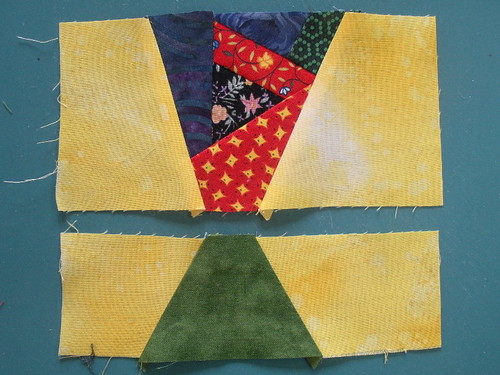
- Assemble the bottom of the block by sewing the two background pieces to the basket base. Press the seams toward the base.
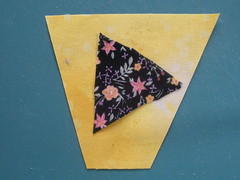
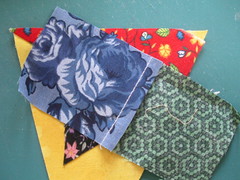
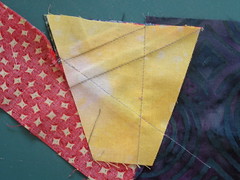
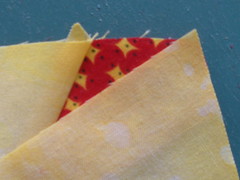
- For the basket, you'll need a collection of small scraps. Try to use at least 5 fabrics in your basket. Use the basket shape you created as the foundation for piecing the scraps into a basket. Make CERTAIN that you foundation is RIGHT SIDE UP and you are sewing your scraps to the RIGHT SIDE. In this example, I started with a triangle and added strips log cabin-fashion. You could also use this as a foundation for straight strings. If you have crumb blocks or string yardage, cut it using the basket shape as your pattern–remember to keep both the pattern and the pieced fabric right sides up when cutting. Be sure that you continue to sew 1/4 inch seams as you add scraps to the foundation.
You can create new lines as you add pieces and trim after the seam is sewn.

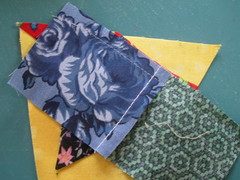
- After you have covered your basket foundation with scraps, turn it over and trim your piece from the back, using the foundation as a guide.
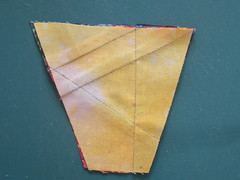
- Your basket shape will fit perfectly back into the background for the middle third of the block. Press the seams toward the background. NOTE: Depending upon the angle of the sides of your basket, you may need to slide the background fabric so that the point hangs over the edge to make sure the top and bottom edges are aligned at the point where the 1/4 inch seam will be made.
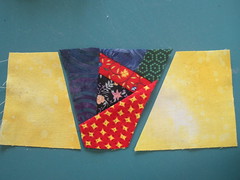
- Attach the basket section to the base section by sewing the bottom two thirds of the block together, aligning the basket bottom with the base top.
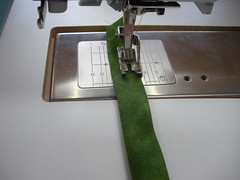
- The basket handle is cut on the bias, 1.5 inches wide, from the same fabric as the base. (I probably should have pressed that fabric first, huh?)
- Fold the basket handle in half, WRONG sides on the inside, and stitch (a normal 1/4 inch seam). The thread color doesn't matter because this seam will be hidden.

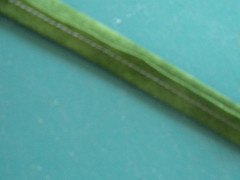
- Trim the seam to approximately 1/16 inch (eyeball it). Roll the handle/tube you've created so that the seam is in the center. Press the handle piece flat. The seam (and seam allowance) will now be hidden.

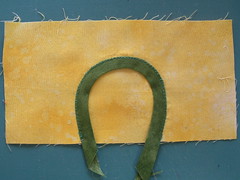
- When deciding on the handle placement, keep in mind the finished size of the block--8 1/2 inches tall in this example. It may not seem like that bias strip will bend . . . but it will. The handles may be as tall or short as you decide, but they should have a nice curve. Use a ruler and keep in mind the finished size of your block when deciding how tall your handle will be.
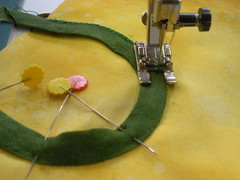
- Initially, just make sure that the outside edge of the basket handle is smooth and pin it in place until you sew it down.

- Stitch down the outside of the handle, by hand or machine. It can be machine stitched using a straight stitch very close to the edge, blind stitch or blanket stitch. Use thread in a matching color or invisible mono-filament.
- After the outside of the handle is attached, take it back to the iron and gently press and manipulate and the inside edge of the handle until it lies nice and flat. Then, stitch down the inside edge. Trim the bottom edge of the handle even with the background fabric.
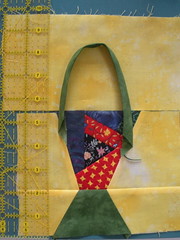
- Position the top third over the bottom, centering the basket handle and sew that last seam!

- Now trim the block to size. In this case it was 6-1/2 inches wide by 8-1/2 inches tall.

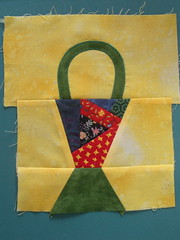
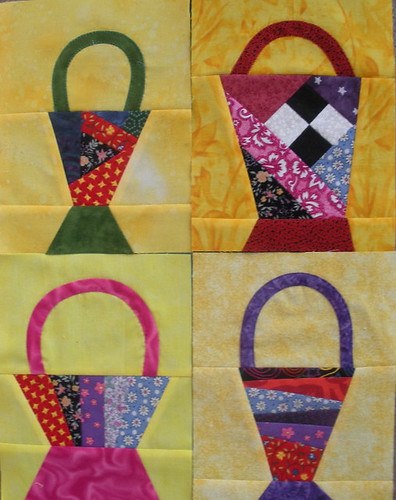
Here are four blocks, made with very different proportions and different techniques for the scrappy center unit. Mix it up or stick with the proportions that look best to you, then fill your baskets with scrappy goodness.
For more great examples of these liberated basket blocks, check out the blocks being made for the Block Lotto. You can also see some of the blocks made by the sneak peekers in my flickr photo stream, tagged liberated basket quilt block.
If YOU make a quilt or other project using this block, I'd love to have a photo for the new Gallery page.
2 comments:
Love this block Sophie, the scrappiness calls to me, but I LOVE the fact I can applique the handle by machine or hand! YAY! I so love choices :) This block makes me happy!
Hi Sophie
I really love this block too! I'm usually not that attracted to the traditional basket type patterns but this one really caught my creative eye. I love the "wonkiness" free form of it...lol
I have been away for awhile but this one may bring me back...can I play?
Pat K. (phx515)
Post a Comment