 Liberated-style wonky blocks are carefree and charming. They are fun to make and result in a fresh twist on a traditional favorite.
 Here are three approaches for making an 8-inch wonky version of a Shoo Fly block. The same techniques could be applied to your go-to traditional block for a new take on that old favorite.
The first is Gwen Marston's technique, as presented in her book, Liberated Quiltmaking. (I'll just be sharing an overview and the measurements to start for an 8 inch finish.) Number two is a block created by drawing the wonky block with your rotary cutter and is a similar technique to the Tic-tac-toe block I posted at the end of last year. Last is a stack and slash technique in which you also draw with your rotary cutter to create two matching blocks with the fabric placements reversed.
Technique 1 - Gwen's Liberated Shoo Fly
I think three things characterize the Liberated Quiltmaking approach to this block:
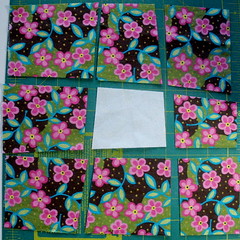
- You begin with 9 same-sized squares, as if you were making the traditional block.
- You introduce wonky-ness into the block by replacing the triangle-squares in the corner with triangles added to the background squares in different sizes and at random angles.
- You may square up and trim the block at an angle after it's assembled.
To make an 8 inch shoo-fly block, begin with nine 3 1/4 inch squares. After you add the wonky triangles to the corners, be sure to trim the background fabric away and square up the units to 3-1/4 inches. Once the block is assembled, you will need to square up your block, trimming slightly to make them 8-1/2 inches after they are sewn.
If you want to go off the grid for a wonkier block or try a different technique . . .
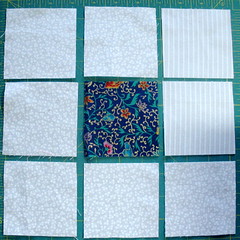
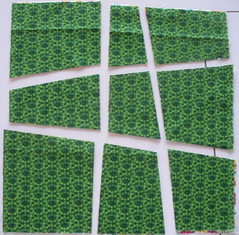
Technique 2 - Drawing with Your Rotary Cutter This technique will be familiar to anyone who has made the Tic-Tac-Toe blocks posted here at the end of last year. This version of a wonky Shoo Fly block is based on a 9-patch grid that is drawn with proportions and angles chosen by you.
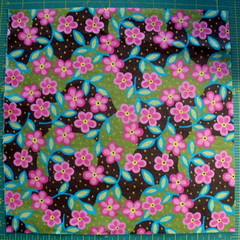
- To begin, start with a 10 inch square of your BACKGROUND fabric. You will also need a small amount of shoo-fly fabrics (Krista was able to make hers usinga 10" square for the background plus a 5" charm squares of floral fabrics)
- Using a rotary ruler (as a straight edge, not to measure), cut the square into a 9-Patch.
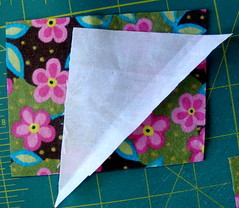
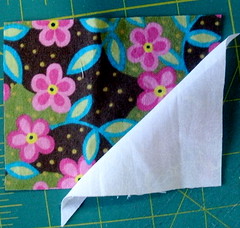
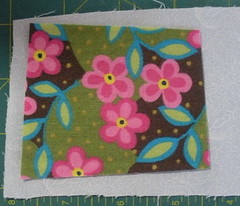
- Remove the center of your 9-patch and use it as a template to cut a new center from the shoo-fly fabric. Be sure that both your "template" and your new fabric are right-side up, because the shapes you create may not be symmetric in any way or reversible.
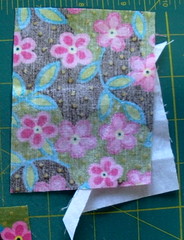
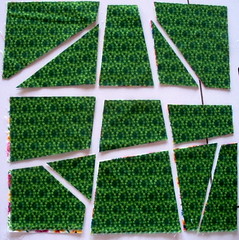
- Add triangles of the shoo-fly fabric to the corner units. Because these corners may not be square, be sure that the triangles you add will completely cover after they are sewn and pressed.
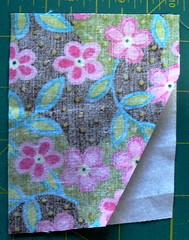
- After they are sewn and pressed, first trim them from the back, using the original corner as your guide to re-create the original "drawn"-by-you shape. Then, trim away the background fabric from behind the triangle.
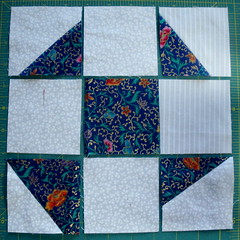
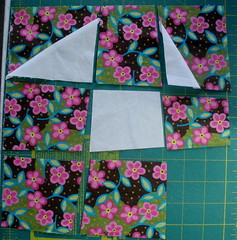
Because the units of this block are all different shapes, I decided to remove one corner from my layout at a time and replace it after the triangle was added and trimmed, so everything went back where it belonged. - Once the triangles have been added and trimmed, the block can be assembled in 9-patch fashion, frist sewing the units into rows and then sewing the rows together.
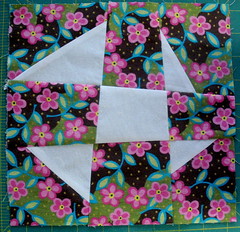
Trim the block to 8-1/2 inches square (for an 8 inch finished size block).
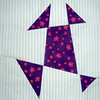
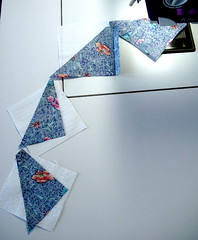
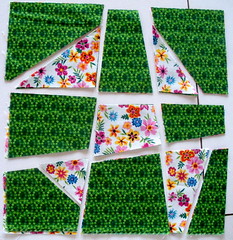
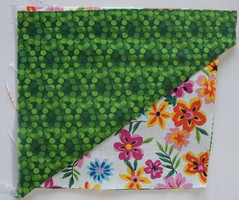
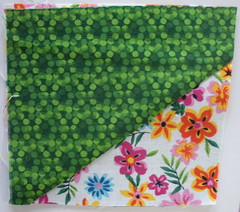
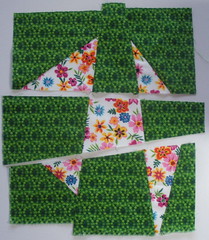
- For an 8 inch Shoo-Fly block, begin with two 11 inch squares of fabric. Stack them with edges matching, right sides up.
- Using a ruler to ensure you cut straight lines, cutting through the stack of 2 fabrics, cut a wonky 9-patch. Then, cut across each of the corners to create the "outline" of a wonky shoo fly.
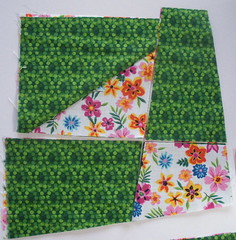
- Switch the top and bottom fabrics as shown. Your two blocks are now cut, laid out and ready to sew.
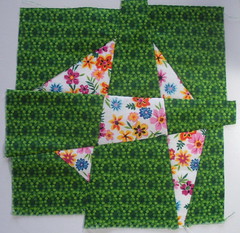
- Sew the "triangles" in the corners together. Don't worry that everything doesn't match after it's sewn. Press and trim off the excess, maintaining the "lines" you created when you "drew" the block.
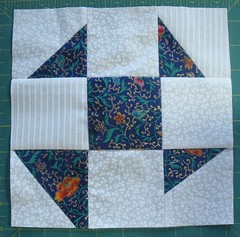
- After the corners are sewn, the corner units will be shorter than the "middles." Don't worry. Match the edges closest to the center and let the outside become ragged. You'll be trimming it. Your block may now look something like this, a crooked 9-patch whose units don't exactly match up.
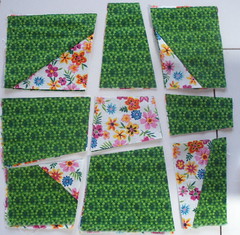
- Sew the block together, like a 9-patch, first sewing the units to form three rows, then sewing the rows together. The outside edges of your assembled block will likely be VERY uneven.
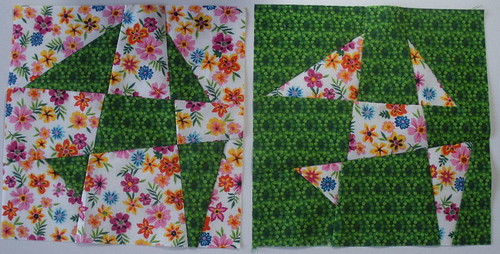
Square up and trim to your blocks to 8-1/2 inch square (for an 8 inch finished block).
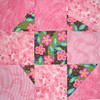
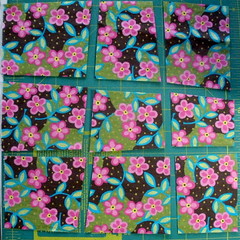
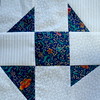
Some Wonky Examples
Here are 60 of the blocks already created by Block Lotto sneek peakers, Ginny, June, Kathie, Krista, Louise, Michelle, Pat, Terri and me. (Click any of the small photos for a better look.)


Will you make some wonky fly blocks or wonkify another traditional block? I'd love to see the results. For more about these blocks (and more) and to see what the winners will do with them, check out the Block Lotto blog, in April.