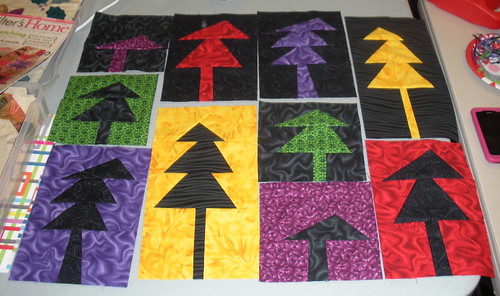
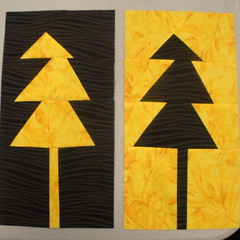
These are my tree block pairs for the December 2010 block lotto. They are 6.5 inches wide (to finish at 6) and 6.5, 9.5 or 12.5 inches tall (to finish at 6, 9, or 12)
The technique is a variation of my Free-style Tree blocks. Here's how. For each pair of trees, I started with two pieces of fabric, 8 inches wide and as tall as my target size plus 2-3 inches. So, for the yellow/black tree pair (which will finish at 6 by 12), my rectangles were cut at 8 x 15 inches. For my 6 x 9 blocks, my beginning rectangles were 8 x 12 inches. And for the inches squares, I began with 8 inch squares.
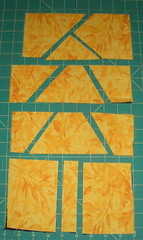
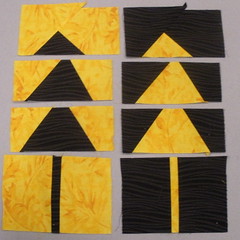
- Begin by stacking your two fabrics evenly and making horizontal cuts. Use a ruler so the seams will be straight (and easy), but they don't have to be perfectly horizontal. I tended to make the top and bottom sections a little larger because I knew I would be trimming a little at the end when I cut my blocks to size. The number of cuts you make will determine how many side-ward pointing "boughs" your tree will have.
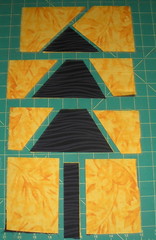
- "Draw" the appropriate part of the tree in each section:
- 2 vertical cuts in the bottom section form the trunk
- a triangle in the top section to form the top of your tree--be sure to leave a lot of "sky" at the top if you want to avoid losing the point
- wedge shapes--shorter on the top edge than the bottom and slanted on the sides--in the middle section(s)

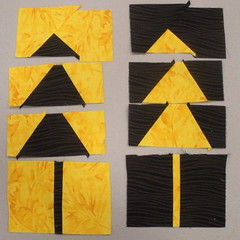
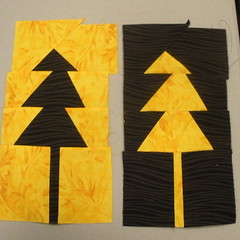
- Swap the fabrics in the tree sections to create your trees.
- Sew the block together by first sewing the pieces in each "row."
- After each row is sewn, trim the top and bottom edges even. You can leave trimming the top and bottom of the block until later.
- Sew the sections of tree together.
- Square up and trim to your target block size. (For my block, 6.5 x 12.5 inches.
No comments:
Post a Comment