


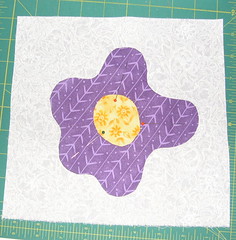
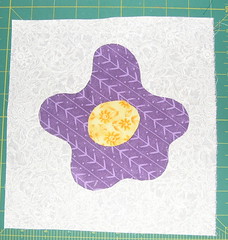
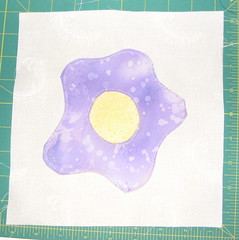
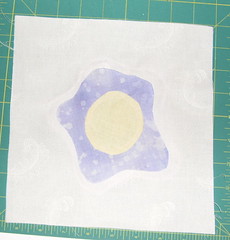
One approach uses freezer paper and a glue stick; for the other, you'll need some sort of heat-resistance template material (I used lightweight cardboard) and starch. The two blocks on the left were created using the freezer paper-glue stick approach; the one on the right was made using a heat-resistant template and starch.
FREEZER PAPER TEMPLATES
For this method, you'll need freezer paper, a water soluble glue stick, a towel and some water.
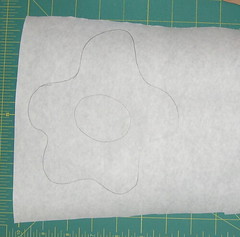
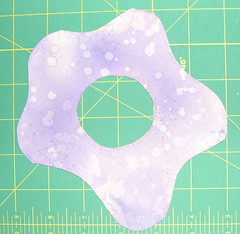
- Trace the design onto the non-shiny side of a piece of freezer paper.
- Cut out the template (on the line) and iron it to the wrong side of the flower fabric.
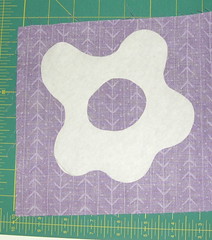
- Cut out the fabric, leaving approximately 1/4 inch seam allowance.
- Using a piece of scrap paper to work on, apply glue stick to the seam allowances. Fold them back and stick them to the freezer paper. You will need to clip the fabric wherever there are inside curves.
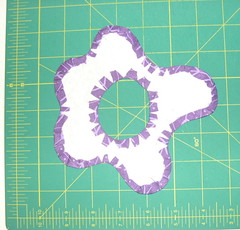
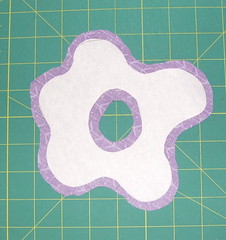
Your appliqué is now ready to use.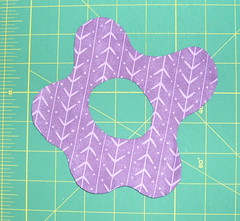
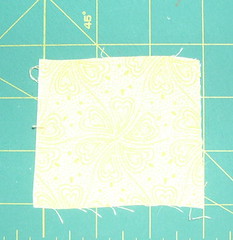
- Using this technique, you do not need to make a template for the center of the Posy. The center fabric can be rough cut - it should be large enough to fit behind the flower element, extending beyond the edge at least 1/4 inch, but make your life easier and be generous. The center fabric should be prepared like the background, starched and pressed.
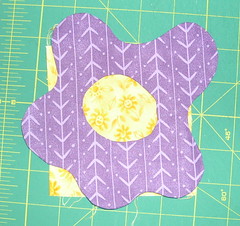
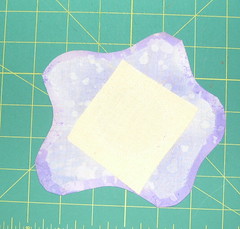
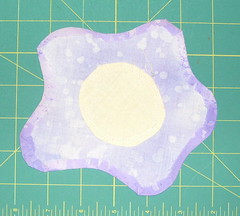
- Begin assembling the block by sewing the flower to the center fabric. You can hold it in place with pins or a little glue stick. After it's sewn, turn the appliqué piece over and trim the excess center fabric, leaving a 1/4 inch seam allowance.
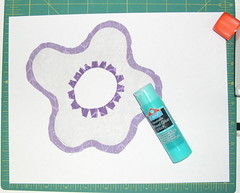
- Place the Posy appliqué on the center of your background square. Pin or glue-stick in place.
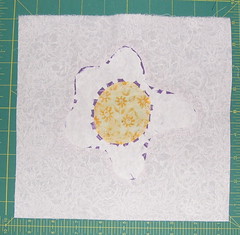
- Stitch the Posy in place, then turn over the block and cut away the background fabric behind the flower.
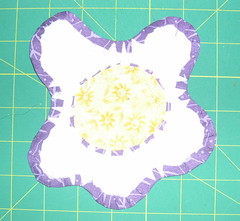
- To remove the freezer paper, you must first loosen the glue. place the block on a towel and spray with water. (Again, my advice is to be generous and make your life easy - it's only water.) Use a q-tip, orange stick or similar tool to lift the seam allowances from the freezer paper, so you can remove it. Let the block dry and press or press it dry.
- Square up the block and trim to 8.5 inches. You're done.

This block was sewn using clear mono-filament with a blind hem stitch.
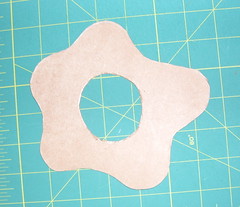
For this method, you'll need liquid or spray starch and some sort of heat-resistant template material. It could be heat-resistant template plastic (made especially for this technique) or some lightweight cardboard, like I used in my sample block. You'll also need q-tips or a small brush.
- Create a template from your pattern.
- Trace the template on the BACK of your flower fabric
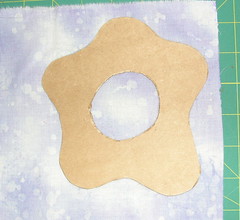
- Cut out the flower fabric, leaving approximately 1/4 inch seam allowance. Clip any inside curves, up to, but not into the drawn line.
- Take template and fabric to the ironing board. Put the fabric right side down and place the template over it, lining it up on your drawn lines. Using a small brush or q-tip paint the starch on the seam allowance. If you are using spray atarch, you can spray some inside th lid then use the liquid with your brush. Fold the painted seam allowances up over the template and press in place.
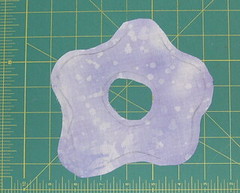
- Allow the fabric and template to cool, then gently remove the template. I press the fabric (and it's nicely turned under edge) one more time to make it nice and flat.
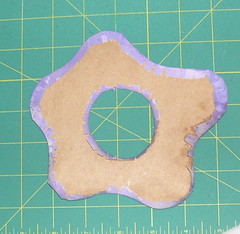
- The assembly of the block is similar to that with freezer paper templates. The center fabric should be starched and pressed then pinned in place.
- Stitch the flower to the center

- Turn the Posy over and trim the center fabric, leaving a 1/4 inch seam allowance.
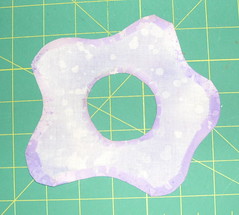
- Center the Posy on the background square and pin in place. Stitch.
- Turn the block over and cut away the background fabric from behind the flower.
- Press the block, square up the block and trim to 8.5 inches and you're done .
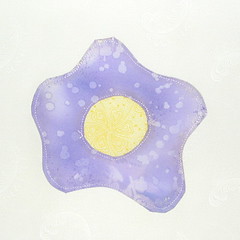
This block was sewn with purple matching thread using straight stitch.
2 comments:
I am learning applique and all the tips, tricks and pointers are wonderful. Thank you for including all of your applique advice.
I love this, it reminds me of fried eggs and green ham!
Post a Comment