Showing posts with label tree quilt block. liberated tree. Show all posts

Saturday, December 11, 2010

Adding Complexity to the Simple Tree Block

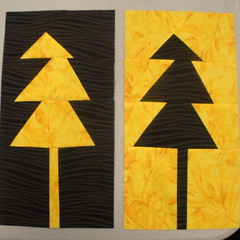
If you surfed past the Free-style Tree blocks because you thought they weren't interesting enough on their own . . . consider adding a few boughs, using the drawing with your rotary cutter technique to add some complexity and interest.  I also liked the idea of making a mix of trees with varying complexity and height.

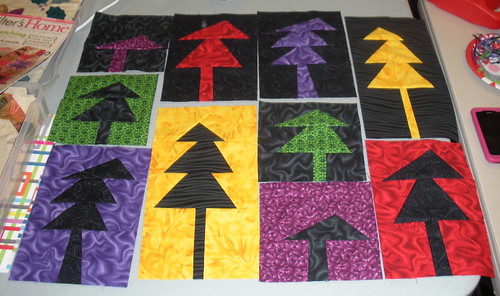
Sophie's Trees

These are my tree block pairs for the December 2010 block lotto. They are 6.5 inches wide (to finish at 6) and 6.5, 9.5 or 12.5 inches tall (to finish at 6, 9, or 12)

The technique is a variation of my Free-style Tree blocks.  Here's how.  For each pair of trees, I started with two pieces of fabric, 8 inches wide and as tall as my target size plus 2-3 inches.  So, for the yellow/black tree pair (which will finish at 6 by 12), my rectangles were cut at 8 x 15 inches. For my 6 x 9 blocks, my beginning rectangles were 8 x 12 inches.  And for the  inches squares, I began with 8 inch squares.
  1. Begin by stacking your two fabrics evenly and making horizontal cuts.  Use a ruler so the seams will be straight (and easy), but they don't have to be perfectly horizontal.  I tended to make the top and bottom sections a little larger because I knew I would be trimming a little at the end when I cut my blocks to size. The number of cuts you make will determine how many side-ward pointing "boughs" your tree will have.
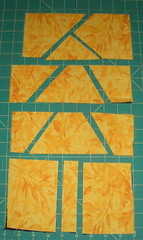
  2. "Draw" the appropriate part of the tree in each section:
    • 2 vertical cuts in the bottom section form the trunk
    • a triangle in the top section to form the top of your tree--be sure to leave a lot of "sky" at the top if you want to avoid losing the point
    • wedge shapes--shorter on the top edge than the bottom and slanted on the sides--in the middle section(s)
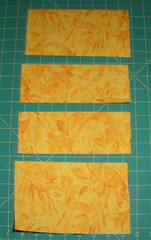
    Stack 2 Fabrics and Slice Draw your tree
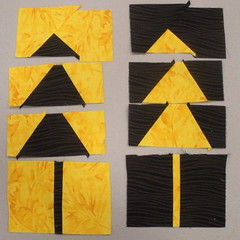
  3. Swap the fabrics in the tree sections to create your trees.
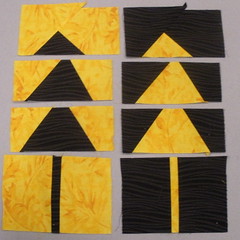
  4. Sew the block together by first sewing the pieces in each "row."
  5. Swap top and bottom fabrics Sew rows
  6. After each row is sewn, trim the top and bottom edges even. You can leave trimming the top and bottom of the block until later.
  7. Trim edges
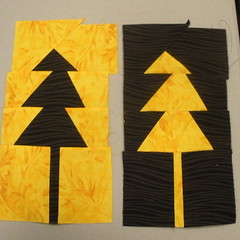
  8. Sew the sections of tree together.
  9. Sew rows together
  10. Square up and trim to your target block size. (For my block, 6.5 x 12.5 inches.
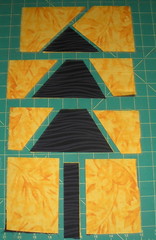
  11. Square up block
Click here for a look at many more examples of the "Jewel-tone Forest" quilters have made for the block lotto--if you're interested in joining us, there's still time.  The deadline is December 31.

Wednesday, April 21, 2010

Free-style Tree Block

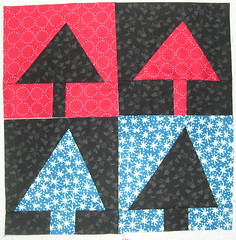
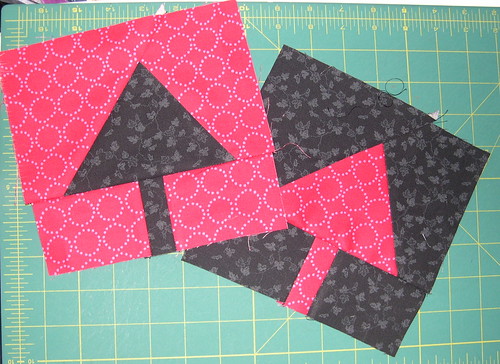
Four Tree BlocksI confess this idea was a Block Lotto idea reject–I liked it. but the feedback from a  couple of people from whom I solicited an opinion was that they thought it was  too simple.

Personally, I still like it and it may appear in the block lotto rotation one day . . . but in the meantime, I couldn't think of any reason not to share the block tutorial. As you might guess from my sample blocks, my original thought was to create a psychedelic forest using pairs of black and bright fabrics.

The measurements in these directions will produce a pair of 6 inch (finished size) block. The block really IS so simple that you could adapt them to produce any size and proportions you need–just start with something that is a couple inches larger than the finished size you want to produce, whether it's a smaller or larger square or a rectangle, tall and skinny or short and wide.  You can also probably imagine how to add complexity to these trees. Think of this simple block as a jumping off point to create a liberated tree . . . or a whole forest of your own.

To make a pair of 6 inch (finished size) blocks:
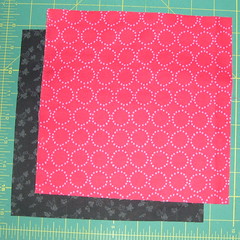
  1. Begin with two 8-inch squares of fabric
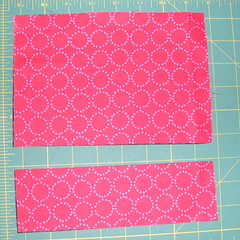
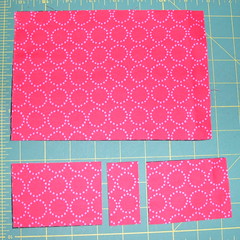
  2. Stack the two squares on top of each other, right sides up.  Make the first cut at least 1-1/2 inch from the bottom.This will define the bottom of your tree.

    1. Start with two squares 2. First Cut

  3. In the bottom section, make two vertical cuts near the middle, at least 1-1/2 inches apart, to create the tree's trunk.
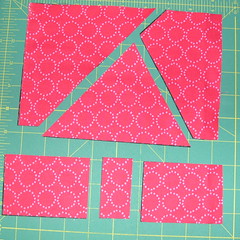
  4. In the top section, make two angled cuts to form the tree shape.  Cut the first one, then pull the sky piece you just created out of the way before making the next cut.

    3. Make two vertical cuts 4. Make two angled cuts
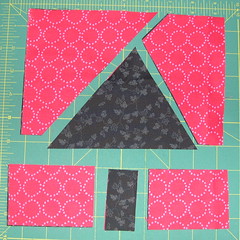
  5. Swap the top and bottom fabrics for the tree and trunk
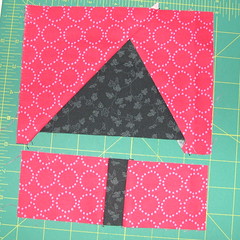
  6. Assemble the top and bottom units.  Trim even and join top to bottom.
  7. 5. Swap Fabrics 6. Sew and Trim
  8. After you have assembled the block, press and square up to 6.5 inches. Your two blocks will be identical with opposite fabric placement.

    Casual Trees